
Global Mapper 001 - Surfaces
Given: LiDAR Cloud or other LAS/LAZ
Create: A Surface Model
Export: Contours to DWG
1. Import your cloud into Global Mapper (Drag & Drop).
2. Menu: Tools -> Configure -> Projection & select the projection you want.
3. Drop down: Color LiDAR by _. Drop down to Color LiDAR by Classification. If some points are brown, drop down to Step 8.
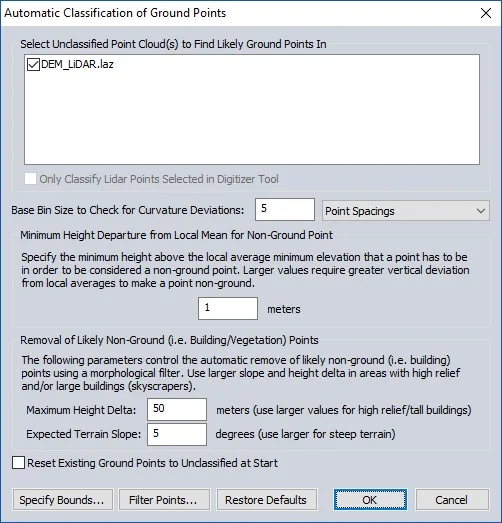
4. Click Auto-Classify Ground Points (2nd button from Color LiDAR by_).
5. These are all based on some mathematical models that boil down to the idea that the points classified as ground act like the ground. We all know that ground does not always act normally, so results will vary. Clouds will also vary, so these settings need to be reviewed per cloud.
6. Here are some settings that should work . They are not optimal, but they will get you started. If it takes a long time (more than a minute to process), hit cancel and play with the settings.
7. You should see a bunch of brown in your scan.
8. Color LiDAR by RGB/Elevation.
9. Filter LiDAR Data (the funnel).
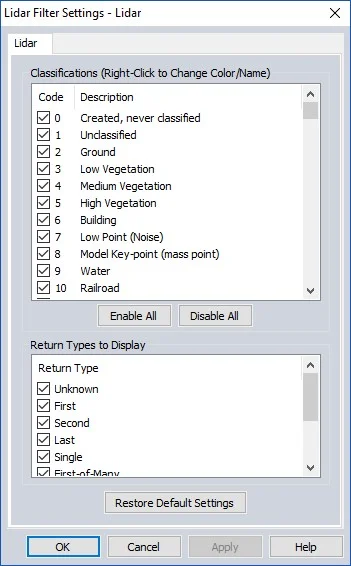
The classes now are the best attempt to figure out what the scanner hit when it scanned. That first swipe will not be perfect and we will get into how to make it more perfect. If the cloud was already classified, their model will not be perfect either. Fortunately if you hit more than half the true ground points, you will still have plenty to make a good surface. Unfortunately, you will have to look out for some points that the computer believed to be ground but are not.
The returns are a bit funny. The laser will go through some objects or it will split and hit more than one object. When it does, you get multiple returns and the computer knows about it. The first of many returns will likely be vegetation. The last of many will likely be ground.
10. In the middle, select Disable All. Go up into the classify list and select 2 Ground. Apply & OK.
11. You should be looking at a bunch of points that represent the ground.
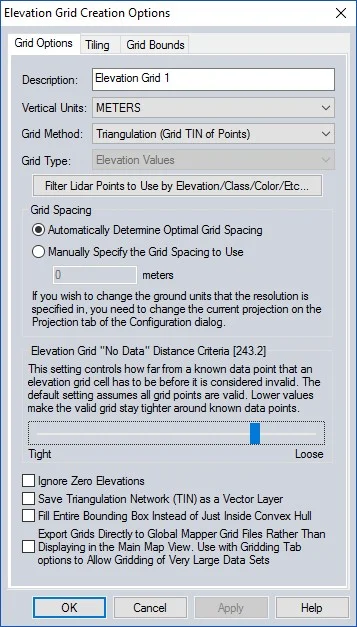
12. Menu: Analysis -> Create Elevation Grid from 3D Vector/LiDAR Data. You can pretty much keep the default settings. This one may take a minute depending on your cloud.
13. If your Control Center (layer list) is not open, open it with Alt+C.
14. Uncheck the LAS/LAZ file.
15. Check out your surface. I will get into how to spot some objects later, but for now, look for rivers, roads, house locations, trails/paths, stone walls and so on.
16. Menu: Analysis -> Generate Contours from Terrain Grid. Try out these settings for Contour Interval (or try your own). Before clicking OK, see the next step.
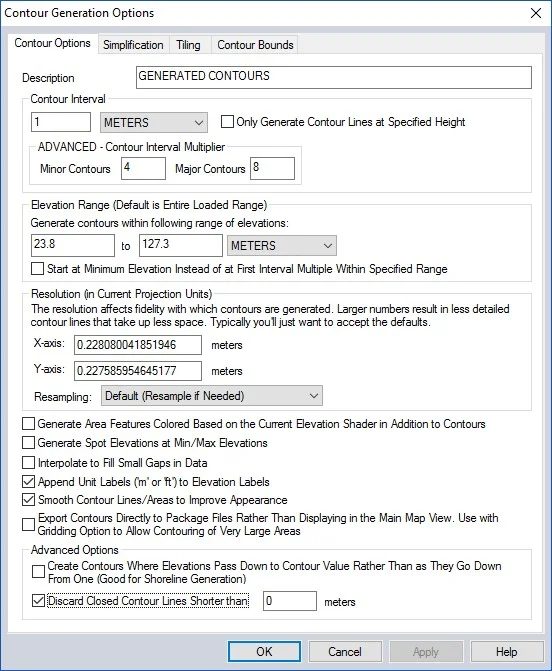
17. You do not have to process everything at once. See the tab above that states Contour Bounds? Inside that you can choose All data, All data visible on the screen, Draw a box and you can even select a polyline to contour inside an area. Check it out and in the worst case, Draw a Box and choose a part of your surface. (It just takes a little longer to do a large area. Does not take much time, just a little longer...)
18. These contours are a little choppy. There are some methods to make them very smooth. I will add that later.
19. Do you still have the Control Center open? Alt+C
20. Right click on your contours, Layer -> Export. You might have to select the feature from some others. You then have a choice between just about every export format. I would go default on the next window and you come to a file dialogue to store the DWG.